 |
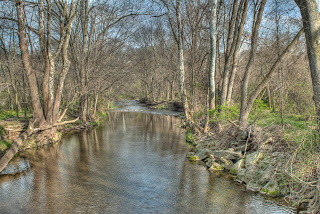
| Realistic HDR looks much like it looked to me. |
Back to HDR, this time more of a "How To". Check back to the earlier post for an explanation of HDR. Here I'll try to make it easy to do. You will need 3 or more exposures to create the image. One will be a normal exposure and half of the others will be darker than that one. The rest will be lighter. In general exposure can be changed by changing one or more sides of the "exposure triangle". The triangle includes ISO, aperture, and shutter speed. When we change exposures for HDR photos we normally change shutter speed. If you take a photo, change the shutter speed, take another, change the shutter speed, take another. It will work fine, but your camera will have to be on a tripod and you will have to change the shutter speed before each of the 3 or more shots, so the question arises: Is there an easier way? And the answer is usually yes.
 |
| Cyprus swamp slightly exaggerated HDR |
Many DSLR cameras have a feature called "Bracketing". Bracketing has been used by photographers since the beginning of photography. Before shooting a photo you will not know exactly how the final image will turn out, so, many photographers took more than one shot, each exposed a little differently so after the film was developed they could choose the best exposure for the final print. Shooting more than one shot of exactly the same scene with different exposures is called "Bracketing". If your camera has this feature you can set the number of exposures (my Nikon can be set for from 3 to 9 shots). Most DSLRs have another feature which is "Continuous Shooting Mode" usually 5 or more frames per second.
 |
With more HDR exaggeration we have a dramatic sky
and incredible detail in the bridge. Many argue that this is
going too far, but I love the effect. |
Let's use both of these modes together. If we set bracketing to create 5 exposures and turn on continuous shooting mode, we can take the 5 exposures in 1 second, maybe less. In many cameras the continuous mode is aware that bracketing is turned on and the camera will stop after the 5 exposures (or whatever number the bracketing is set for). Another feature that hasn't been mentioned is not in the camera but is in the software that creates HDR images. Many programs that create these images will align the images so that if the camera moves slightly in between shots the exposures will be adjusted so that they match before the combined image is created.
 |
Extreme HDR exaggeration and I still like it. Here the effect
is that of a painting that idealizes the building. |
Put these three things together and we have a way to create multiple exposure HDR photographs without a tripod. Hey, a tripod is still a good idea, but if all 5 images are taken in less than 1 second and our software will fix MINOR errors (note that minor is important here) we can get away without using that tripod every time. There are times when we realize that an HDR photo is what we want and we haven't brung the tripod.
It is the nature of the beast that as exposures get longer it is harder to hold the camera still enough to pull this off, so figure that "hand held" HDR shots work best in reasonably bright light. Yes you can kick up the ISO for dimmer light situations but if you look up the post here on ISO you'll be reminded that high ISOs can create noisy images. All of the images in this post were handheld and are sharp even at a much larger size.


No comments:
Post a Comment